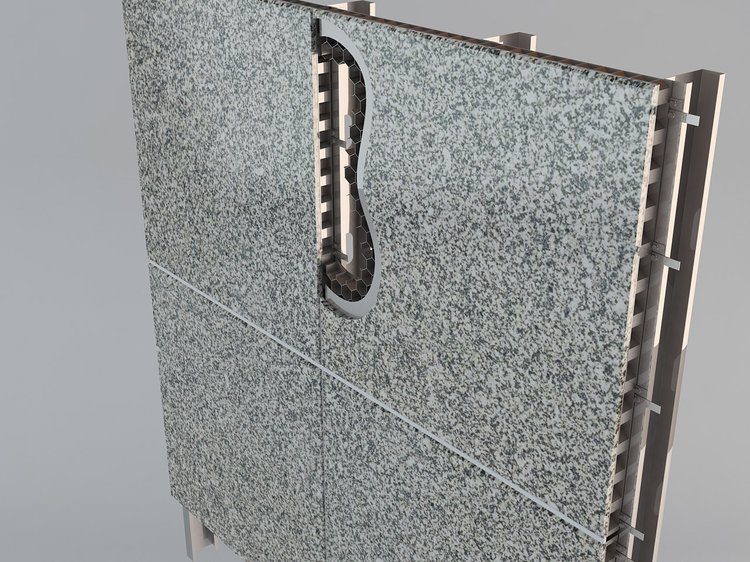
Concealed Screw Attachment of Stone Panels
Real Stone. Real Strong. Real Thin.
Download Concealed Screw Attachment PDF
Installers should be craftsmen with construction experience. Installers should read the instructions. Follow all OSHA and other safety requirements. StonePly panels are a finished natural stone product. Use care to protect them during installation.
Steel stud or furring should
Lateral support and bridging should be installed. Do not rely on StonePly stone panels to provide lateral support for wall framing.
The steel stud framing should have a maximum variation from a true plan of 1/8 inch in 10 feet. Correct any defects prior to proceeding with stone panel installation. Framing studs must be located with studs at panel joint locations.
Stone panels should be stored in a clean, dry area. While StonePly panels are strong and impact resistant, keep in mind that they are a finished product. The natural stone facing can be chipped at the edges and softer stones can be scratched. Limestone, marble, travertine, and other softer stones can be stained by dirt, mud, or construction materials. As they are removed from their crates, StonePly stone panels should be placed on carpet, foam, or other padded surface to protect the stone edges. Also consider laying the uncrated stone panels out in the order they are to be installed to speed up the process and minimize mistakes.
These are general guidelines, not full instructions. Every job is different, and a competent, experienced professional, skilled in construction, carpentry, safety and proper use of tools should direct the work. Consult with a professional engineer to produce calculation and recommendations for fastener spacing to meet wind loading and anchor spacing.